

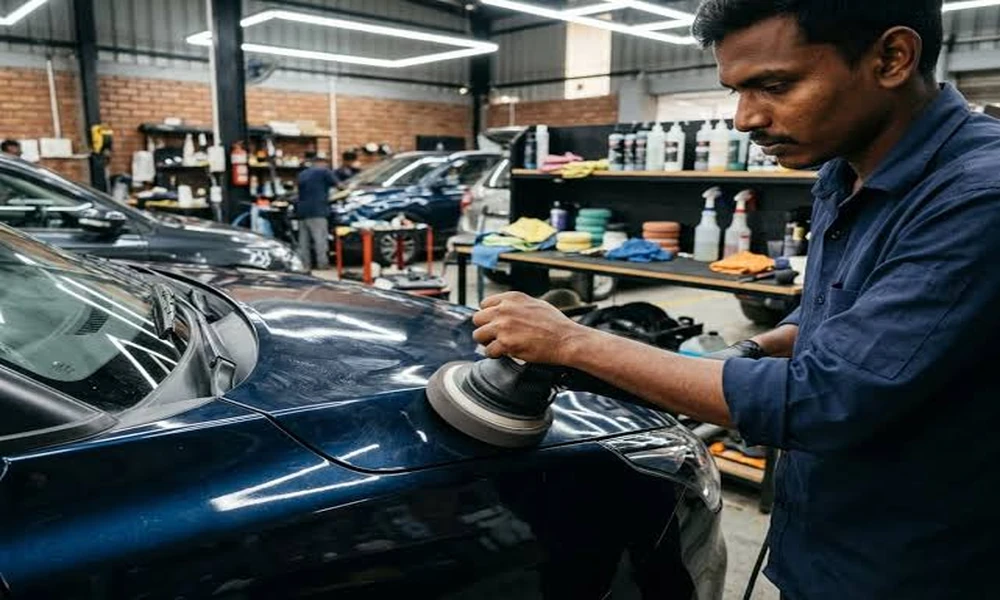
Paint correction is the process of removing surface defects from a vehicle’s clear coat – swirl marks, scratches, water spots, and oxidation – using machine polishers and progressively finer abrasive compounds. When done correctly, it restores paint to a condition that is genuinely cleaner and more reflective than a standard detail or car wash ever will.
It is not a product you apply. It is a physical process that removes a controlled amount of the clear coat to level the surface. That distinction matters – and it is why paint correction should only be performed by someone who understands what they are doing. For a complete technical walkthrough, Springs Detailing’s guide on Paint Correction Explained covers everything from defect types to the multi-stage process professionals use.
Understanding Your Car’s Paint Structure
Before understanding paint correction, you need to understand what you are working with. Modern automotive paint consists of three layers:
| Layer | Thickness (approx.) | Function |
|---|---|---|
| Primer | 30-50 microns | Adhesion between metal and paint, corrosion protection |
| Base Coat (Color) | 40-70 microns | The actual color of the vehicle |
| Clear Coat | 40-80 microns | UV protection, gloss, scratch resistance |
Paint correction works entirely within the clear coat. The goal is to remove just enough material to level the surface – eliminating the scratches and swirls that catch light and make paint look dull – without cutting through to the color coat below. This requires precise measurement, controlled machine speed, and careful pad and compound selection.
What Defects Does Paint Correction Fix?
Not all paint imperfections are the same, and not all of them respond to polishing. Here is a breakdown:
| Defect Type | Cause | Correctable? | Method |
|---|---|---|---|
| Swirl marks | Improper washing, automated car washes | Yes | Machine polish |
| Light scratches | Keys, branches, clothing abrasion | Usually yes (if above color coat) | Compound + polish |
| Water spots | Mineral deposits from hard water | Often yes | Decontamination + polish |
| Oxidation | UV damage, aging clear coat | Partially | Heavy compound, may need respray |
| Holograms | Improper machine polishing technique | Yes | Refine with finishing polish |
| Deep scratches | Sharp impacts reaching color coat or metal | No | Requires touch-up or respray |
| Paint chips | Rock impacts | No | Touch-up paint or PPF |
The Three Stages of Professional Paint Correction
Paint correction is not a single pass with a polisher. Professional work is done in stages, each building on the last:
Stage 1: Decontamination
Before any polishing begins, the paint must be completely clean – not just washed, but decontaminated. This means clay bar treatment to remove bonded surface contaminants (metal particles, tree sap residue, brake dust) that would otherwise scratch the paint during polishing. Iron remover spray is often used first to dissolve embedded metallic fallout. Skipping this step is one of the most common mistakes in DIY paint correction.
Stage 2: Compounding (Cut Polish)
The first polishing stage uses a cutting compound – an abrasive product paired with a cutting or foam pad – to remove the majority of defects. This stage takes the most material off the clear coat and is where the most dramatic improvement happens. It also leaves behind fine haze or marring from the abrasive itself, which must be addressed in the next stage.
Stage 3: Finishing Polish (Refine)
A finishing polish with a softer pad removes the haze left by the compound stage and brings out the final gloss level. This is where the paint goes from looking corrected to looking genuinely brilliant. Some vehicles with minor defects can skip Stage 2 and go straight to a finishing polish – this is called a one-stage correction and is appropriate for lightly swirled paint.
One-Stage vs. Two-Stage vs. Multi-Stage Correction
| Type | Best For | Time Required | Defect Removal | Approx. Cost |
|---|---|---|---|---|
| One-Stage | Light swirls, pre-PPF prep | 3-6 hours | 60-70% | $200-$400 |
| Two-Stage | Moderate swirling, water spots, light scratches | 6-10 hours | 80-90% | $400-$700 |
| Multi-Stage | Heavy defects, oxidation, significant scratching | 10-16+ hours | 90-95% | $700-$1,500+ |
What Tools Are Used in Paint Correction?
- Dual-Action (DA) Polisher – Moves in two simultaneous motions (rotation + oscillation), producing less heat and safer for beginners. Standard tool for most professional correction work.
- Rotary Polisher – Single-axis rotation. More aggressive and faster cutting, but generates more heat. Requires significant experience to avoid burning through clear coat.
- Paint Thickness Gauge – Measures remaining clear coat thickness in microns before and during correction. Essential for knowing how much material you have to work with.
- Light Inspection – A focused LED or halogen light source held at multiple angles to reveal defects invisible in normal lighting. Professional results depend heavily on inspection quality.
- Pads – Range from heavy cutting foam to ultra-soft finishing microfiber. Matched to the compound being used and the severity of defects.
How Long Does Paint Correction Last?
The results of paint correction are permanent in one important sense: the defects that were removed are gone. The clear coat has been leveled and those specific scratches no longer exist. However, paint correction does not prevent new defects from forming.
Most professionals recommend applying a protective layer immediately after correction – either a ceramic coating, a paint sealant, or a combination of PPF and ceramic coating – to slow the return of new swirls and environmental damage. Without protection, a corrected car will begin accumulating new swirl marks within weeks from normal washing.
Signs Your Car Needs Paint Correction
- Paint looks dull or hazy in direct sunlight even after washing
- Circular swirl patterns visible in sunlight, especially on dark-colored vehicles
- Water beads but paint still looks flat underneath
- Light scratches that you can feel with your fingernail
- Cloudy or milky patches on heavily oxidized sections (common on older vehicles)
- Holograms or buffer trails left by a previous poor polishing job
DIY vs. Professional Paint Correction
Paint correction is one of the most technical services in automotive detailing. The risk of burning through clear coat – especially on thin factory paint – is real, and it is not recoverable without a full respray. If you are new to machine polishing, starting with a DA polisher, a gentle compound, and a test panel is strongly advised before working on a whole vehicle.
For anything beyond light swirl removal, professional correction is the better investment. A properly executed multi-stage correction from an experienced detailer produces results that are difficult to replicate at home and protects the integrity of the clear coat in a way that improper DIY work often does not.
Final thought: paint correction is not a magic fix for all paint problems, and it removes material that cannot be replaced. Done well, it is transformative. Done poorly, it accelerates the damage it was meant to reverse. Take the time to understand the process before you pick up a polisher.
Authority Resource: International Detailing Association – Paint Correction Standards
